December 29, 2025
Designing a custom home is never just about walls and finishes. It’s about decisions — hundreds of them — made long before construction begins. Decisions about materials, proportions, light, and how spaces will actually feel once people live inside them.
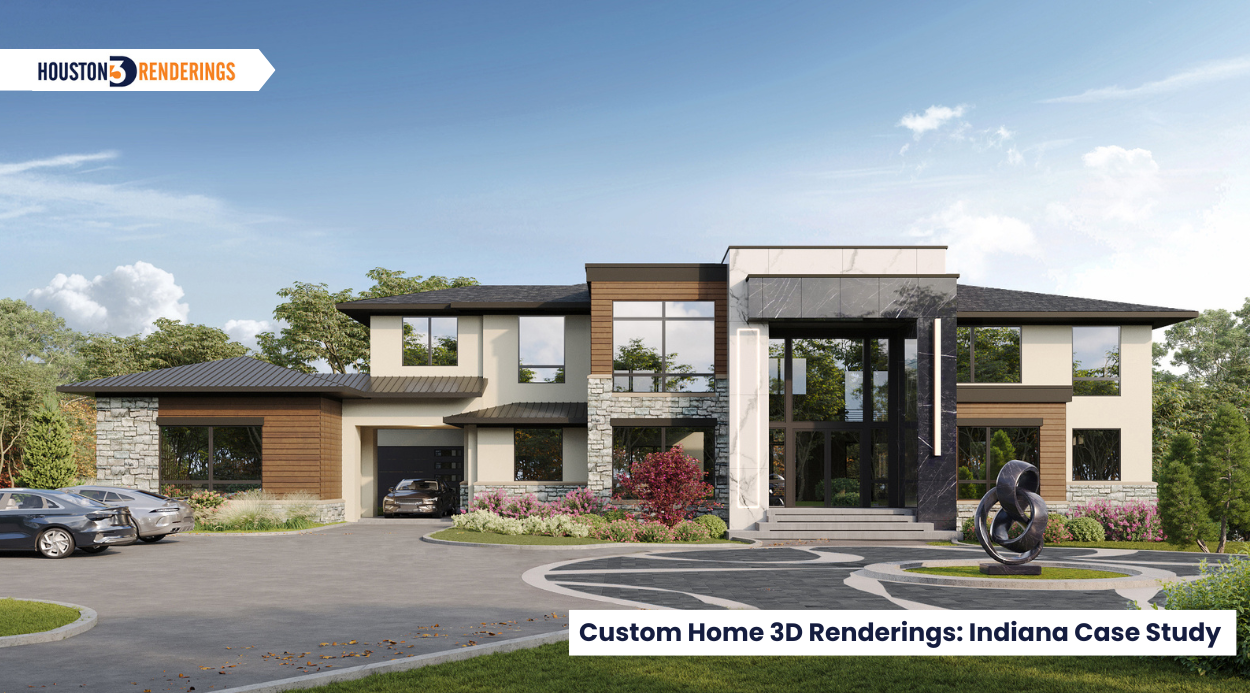
When a custom home builder in Indiana began planning the Grady (Parma) Residence, one priority guided the process from the start: absolute clarity before breaking ground.
With no room for assumptions, the builder needed a way to fully visualize both the interior and exterior of the home, align expectations with the homeowner, and finalize materials with confidence. That’s where Houston 3D Renderings came in.
Every custom home starts with drawings — elevations, floor plans, notes in the margins. But even the best technical documents leave room for interpretation. For the Grady Residence, one critical question shaped the visualization strategy:
How do you truly understand the home — inside and out — before the first brick is laid?
Custom homes demand precision. Exterior materials must complement interior finishes. Sightlines need to feel intentional. Outdoor spaces should connect naturally to interior living areas. This project required more than isolated images — it needed a complete visual narrative.
The goal was to create a comprehensive 3D rendering package that included:
The challenge wasn’t just visual appeal. It was accuracy, cohesion, and confidence.

The exterior design of the Grady Residence focused on balance — blending natural textures with clean, modern contrasts. Each rendering was carefully developed to show how materials interact under realistic lighting conditions, not idealized studio light.
Exterior materials visualized included:
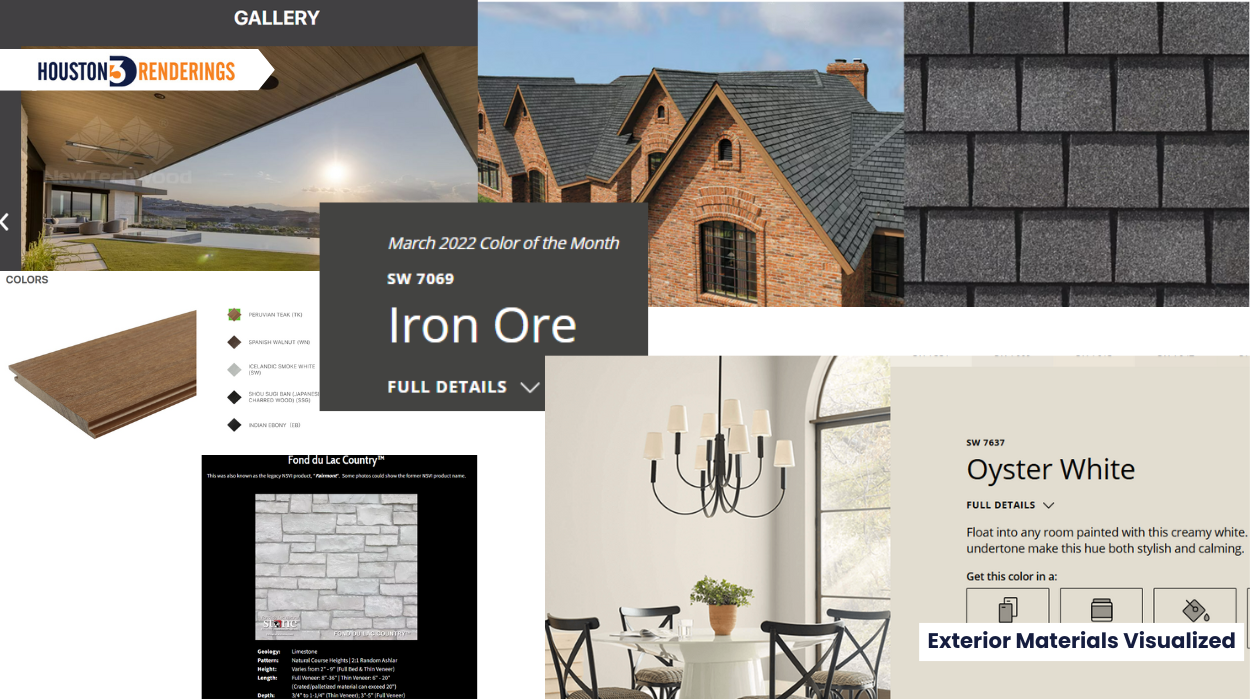
When materials are seen together — in context — decisions become faster and far more confident.

The front elevation rendering focused on a revised entry design requested by the homeowner. Porcelain cladding was rebalanced to create contrast, placing bright white Carrera marble–style porcelain on one side and charcoal porcelain on the other.
Additional refinements included:
The result was an entry that felt modern, refined, and intentional — not experimental.
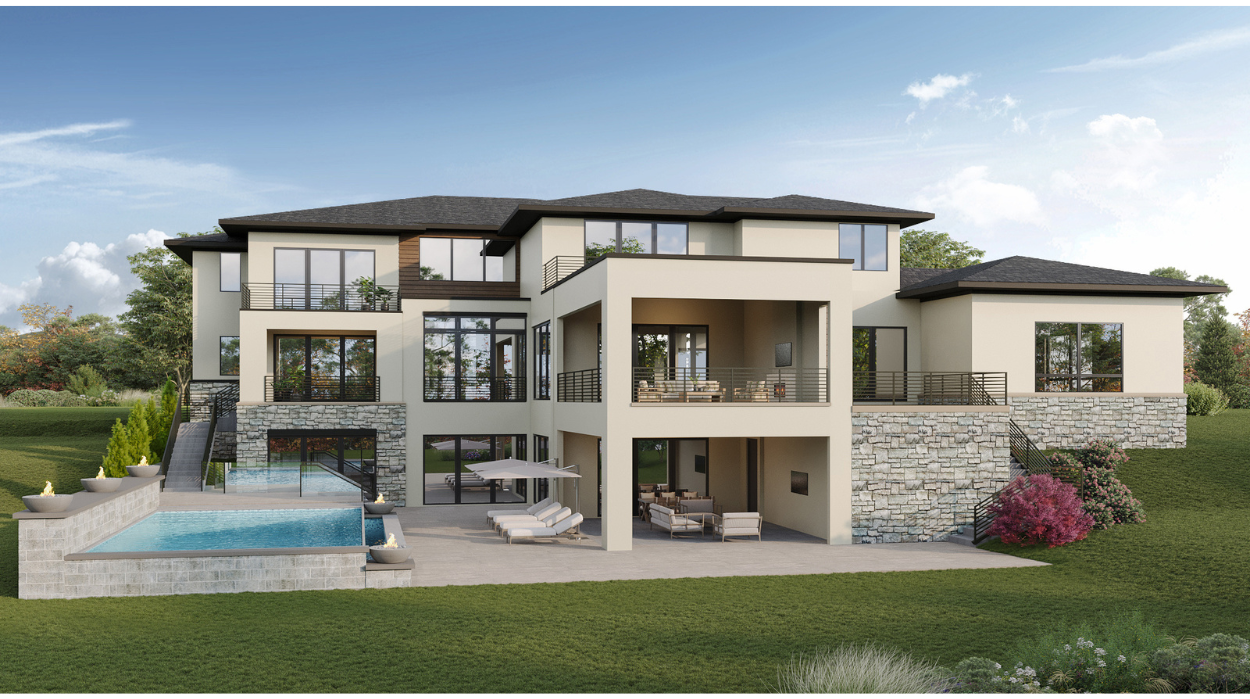
The rear elevation shifted focus toward lifestyle. A revised camera angle better showcased how the home opens to outdoor living areas and the family room beyond.
Key updates included:
These visuals allowed the builder and homeowner to assess how outdoor spaces would actually function — not just how they would look on paper.
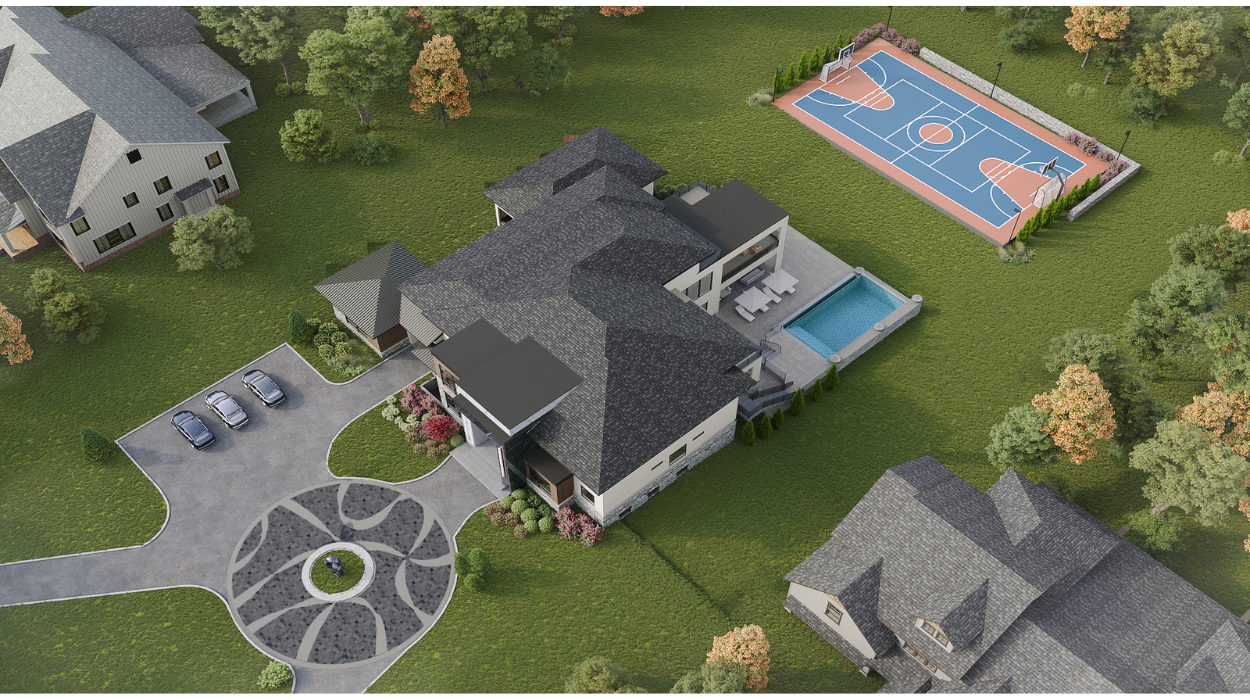
While elevations highlight detail, the aerial rendering delivered perspective. This view combined all approved revisions and clarified site-wide decisions such as:
From above, spatial flow, driveway geometry, and outdoor zoning became immediately clear — eliminating guesswork before construction.
If the exterior defines identity, the interior defines daily life. The interior renderings were designed to feel lived-in, not staged — helping the client understand how spaces connect, flow, and function together.
Interior views included:
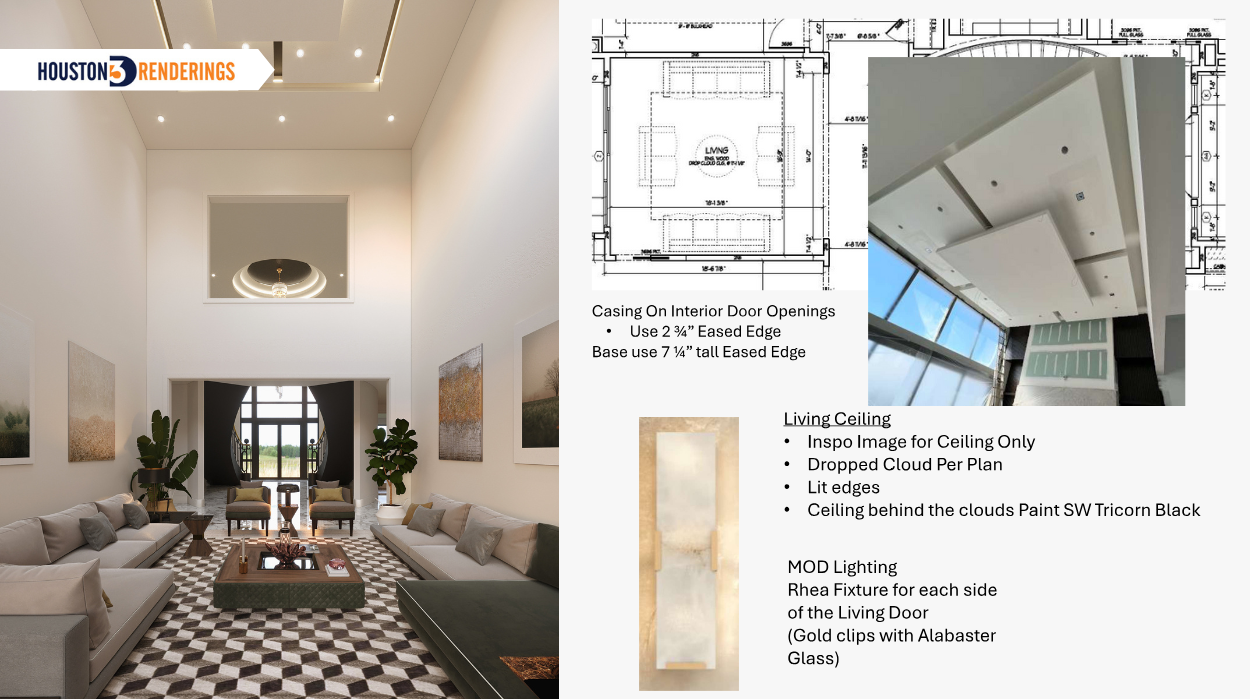
This interior rendering captures the home’s first interior impression, looking from the front entry into the living room. The view emphasizes openness, natural light, and clear sightlines, helping the builder and homeowner understand how the space welcomes guests and transitions into the main living area. Materials, scale, and lighting were carefully balanced to reflect the intended mood of the home.
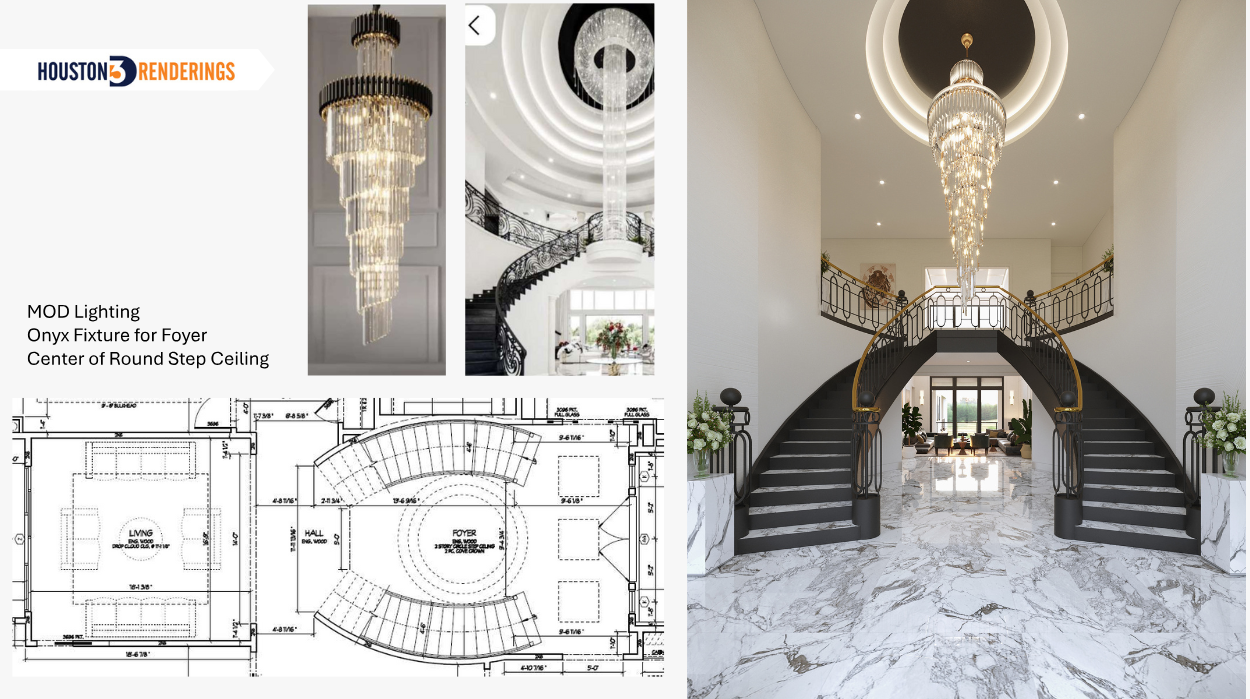
This perspective focuses on spatial flow and connectivity, showing how the living area visually connects back toward the front of the home. The rendering helps clarify circulation, proportions, and furniture layout, allowing the client to visualize how the space functions in everyday use while maintaining a cohesive interior design language.
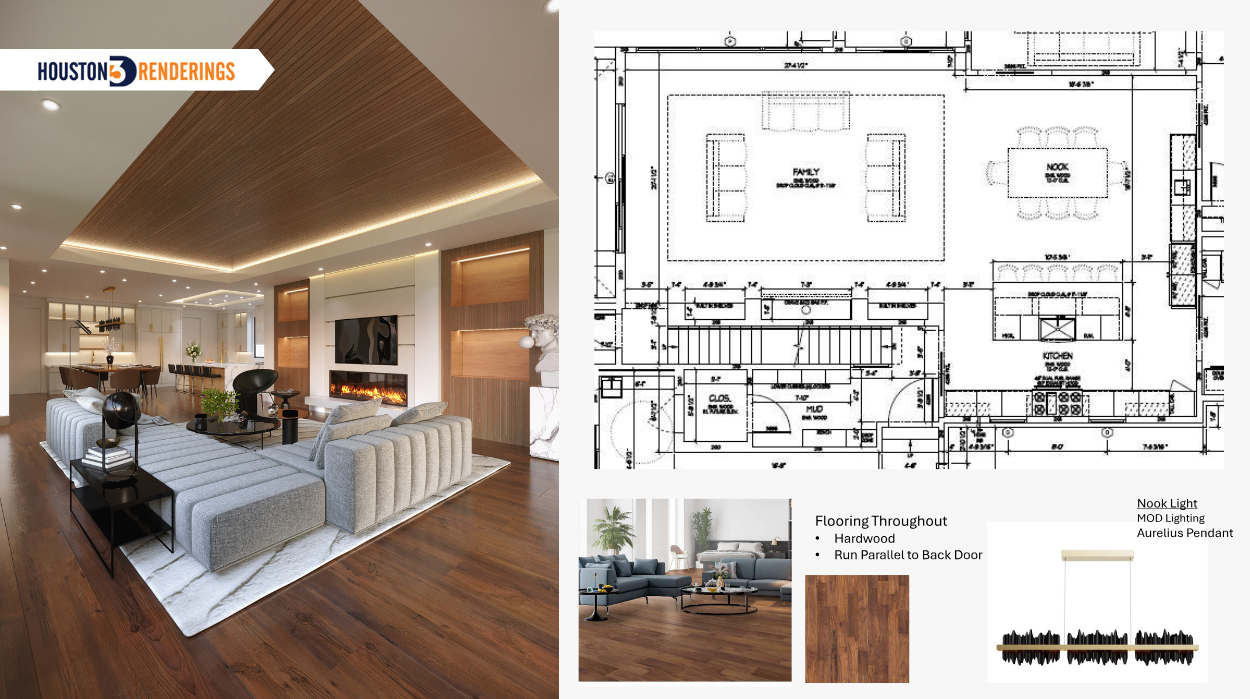
The kitchen and family room rendering highlights the heart of the home, with the fireplace feature wall serving as a central focal point. This view was developed to communicate material relationships, lighting ambiance, and the connection between cooking, dining, and gathering spaces—helping the client confidently finalize key interior design decisions.
Lighting, material textures, and proportions were carefully calibrated to reflect how the home would actually feel at different times of day.
Using architectural plans, finish schedules, and manufacturer-specific materials, the visualization process delivered more than photorealism — it delivered readiness.
This approach helped:
Even with the project located in Indiana, seamless collaboration ensured accuracy at every stage.
Each exterior view served a purpose:
Together, these renderings transformed technical discussions into clear decisions.
Custom homes leave no room for uncertainty. Seeing the full picture before construction begins changes how decisions are made — and how confidently projects move forward.
At www.Houston3DRenderings.com, custom home builders gain clarity where it matters most: before costly changes happen on site. When the vision is clear, the build follows naturally.