August 29, 2026
Cameron, a luxury ski resort developer from Montana, already had architectural rendering images from his architect. But there was a problem.
The images showed the design, but they didn't show it the way Cameron wanted. The bathroom felt too compressed. The bedroom camera didn't show enough of the space. The living room ceiling looked slightly low and the chandelier felt too large. The exterior lighting didn't create the warm late-afternoon atmosphere he was looking for. And the overall material and texture quality of the exterior images needed to feel much more photorealistic.
Cameron wasn't looking for a completely new design. He needed an experienced architectural rendering company that could take the existing work, understand what wasn't working, and carefully rebuild the visuals without changing the original architectural design.
After detailed conversations through phone calls and a Zoom meeting, Houston 3D Renderings began rebuilding the project around his requirements.
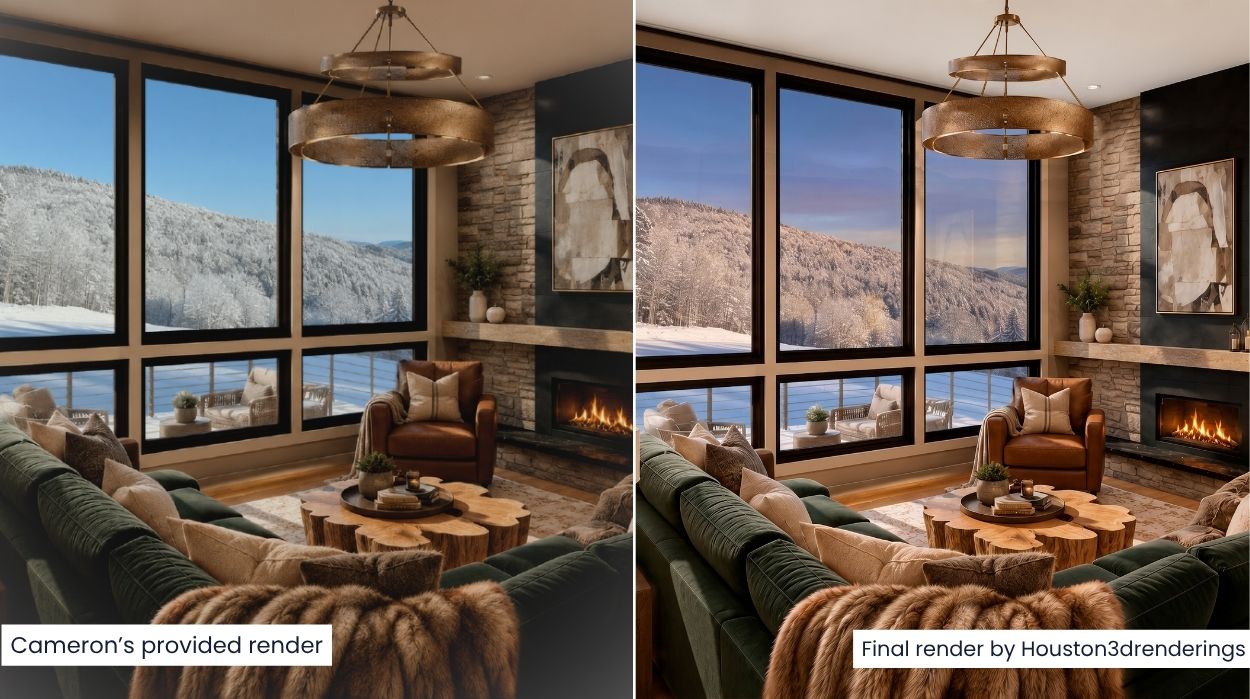
Figure 1. Existing Rendering Images Provided by the Client
Cameron provided the existing rendering images, floor plan drawings, exterior information, and detailed requirements for each space.
The scope included five refined still-rendering images covering:
He also requested three animation sequences for the bedroom, bathroom, and living room. The important part was that the architectural design was not being redesigned. The existing design needed to be represented more accurately through photorealistic 3D rendering, better lighting, improved materials, more appropriate camera positions, and carefully selected styling details.
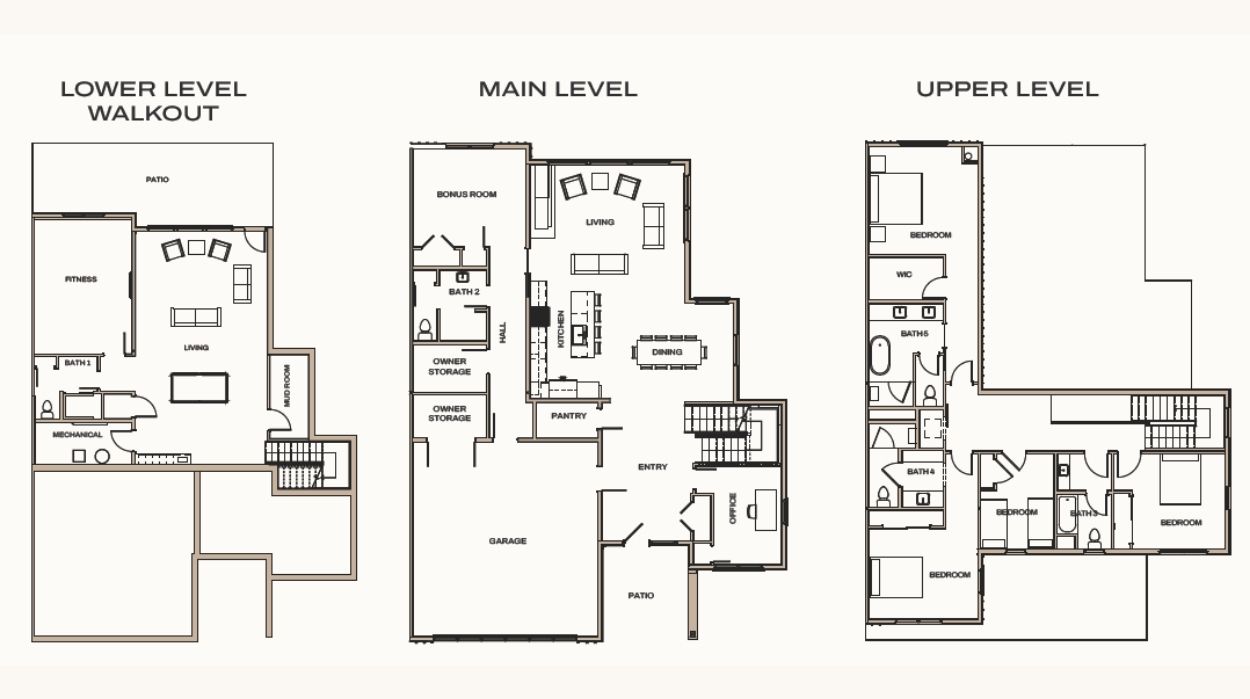
Figure 2. Floor Plan Provided for the Rendering Study
The floor plan helped the team understand the actual proportions of the building, including the 12-foot-high ceiling. But the drawings were only part of the information. The exterior required a different treatment altogether. Cameron wanted the newer front rendering to have more of the material and texture quality found in an older rendering he particularly liked.
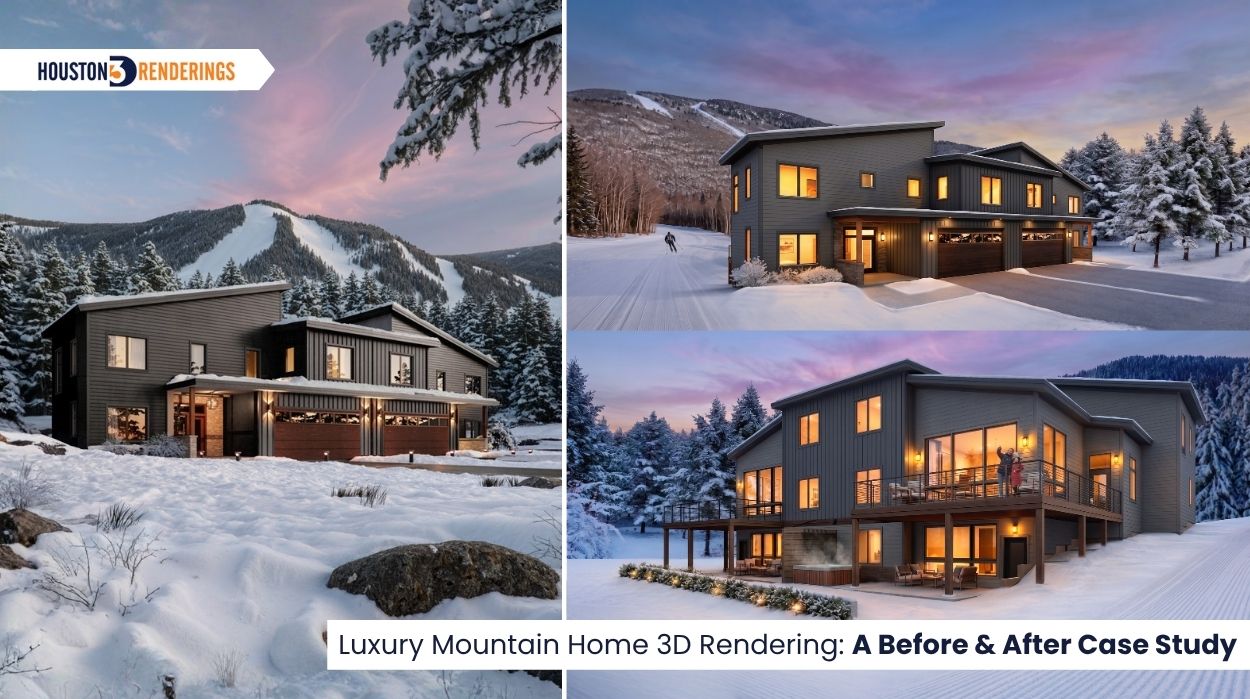
Figure 3. Exterior Reference and Existing Architectural Design
Once the requirements were clear, the 3D artist rebuilt the model using the client's drawings. The objective was straightforward: Keep the architectural design. Improve the visualization. That meant the changes could be very specific.
The bathroom required one of the more noticeable camera adjustments. The original vantage made the room appear compressed, particularly around the bathtub, shower entrance, and sink.
The perspective was therefore expanded to create a more realistic representation of the space. The ceiling light was removed, the wall lights were slightly dimmed, and an abstract artwork was added between the wall lights above the bathtub.
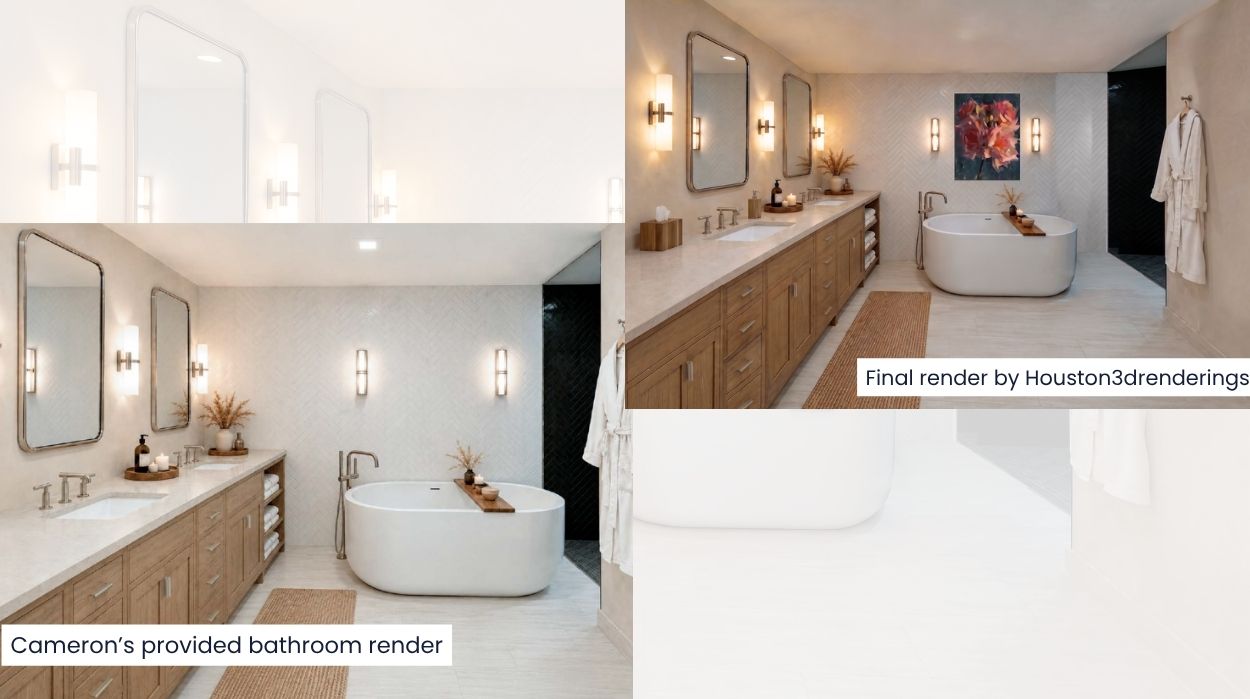
Figure 4. Bathroom Rendering Revision
The original living room had a slightly low-looking ceiling, an oversized chandelier, and exterior lighting that felt too bright for the intended atmosphere.
Figure 5. Living Room Rendering Revision
The original bedroom camera didn't show enough of the room or the full bed.
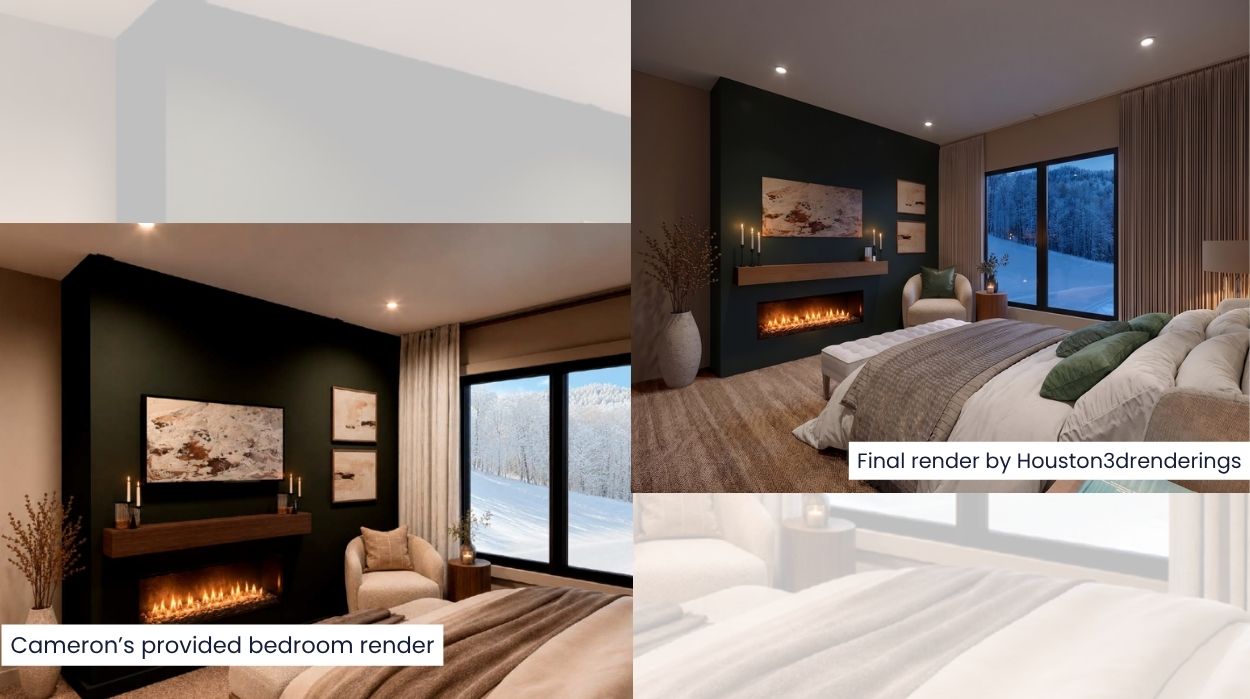
Figure 6. Bedroom Rendering Revision
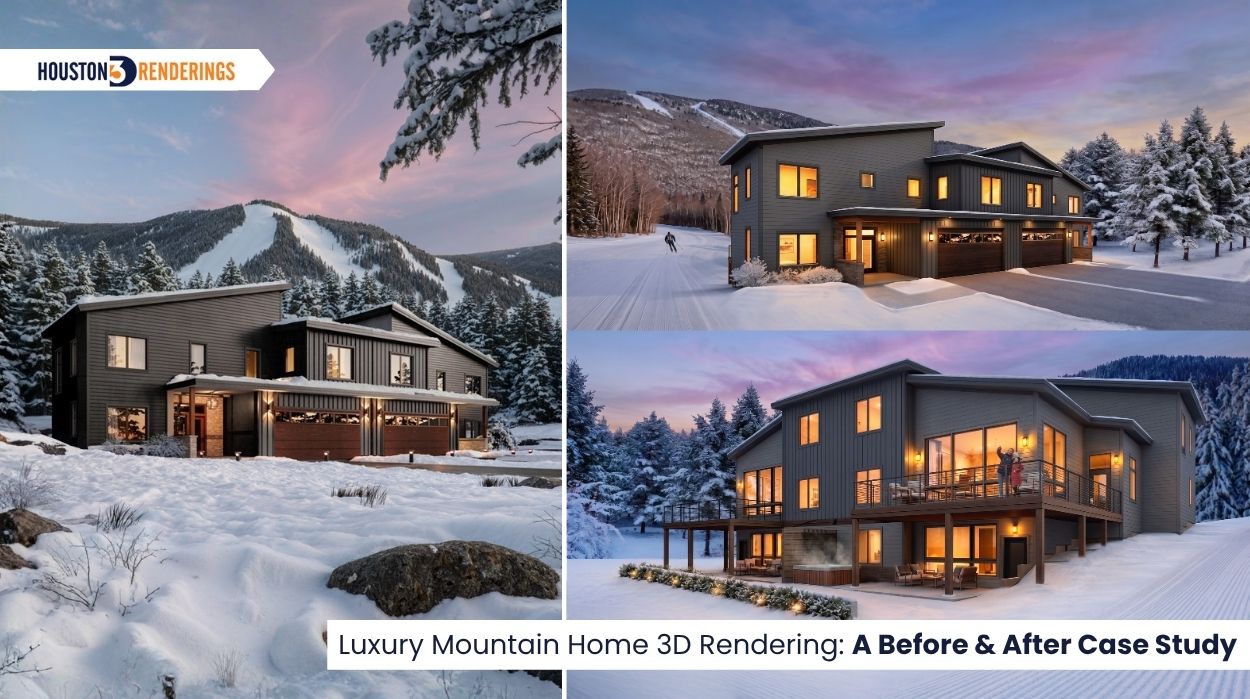
The exterior wasn't simply a matter of making the scene brighter or darker. Cameron wanted a specific late-afternoon winter atmosphere, along with the material and texture quality he preferred from an older rendering.
For the front exterior, the sun was intended to be partially set while the interior and exterior lights remained on, creating a warm end-of-day feel. The sky needed to be darker, but not so dark that the property appeared closed.
Cameron also provided several specific requests:
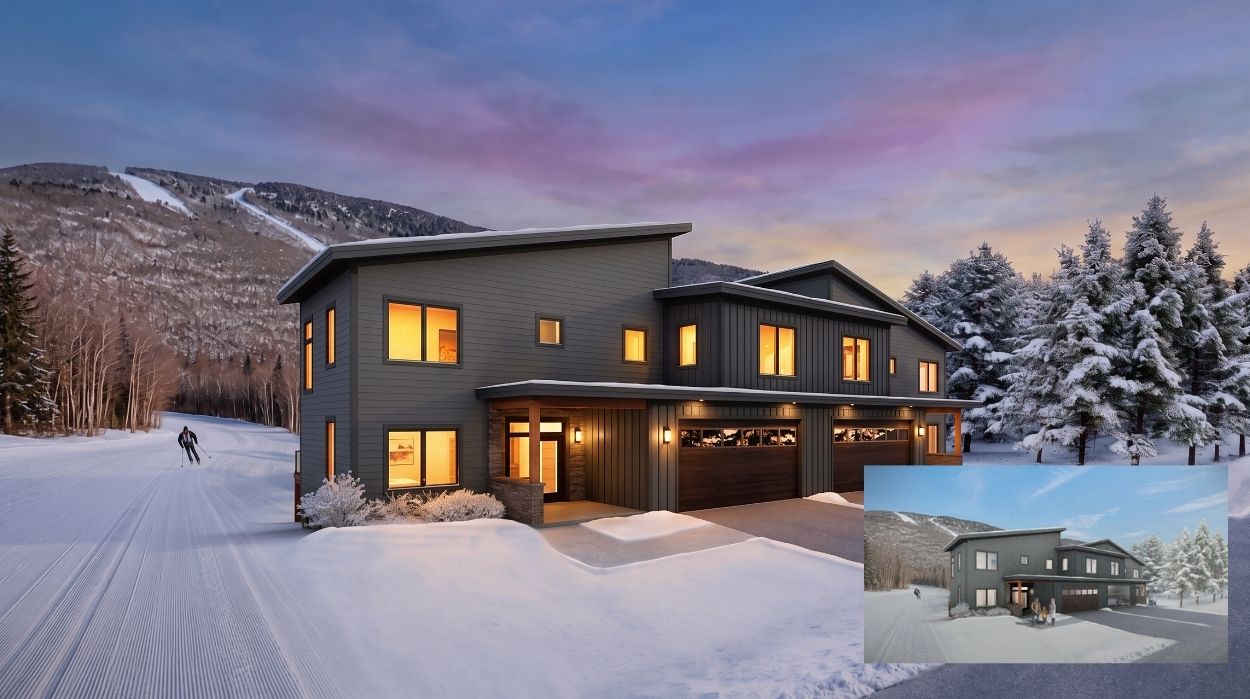
Figure 7. Front Exterior — New Rendering Compared With the Preferred Older Reference
The comparison helped guide the final direction: stronger material definition, richer textures, a more refined brown garage door, and lighting that created the warm late-afternoon atmosphere Cameron wanted. Together, these adjustments gave the exterior a more polished and photorealistic appearance while keeping the original winter setting and architectural design intact.
The rear exterior required a more focused lighting revision. Cameron requested all four upstairs wall lights on the deck to be activated, along with an additional light above the black door at ground level. These changes strengthened the exterior lighting and helped bring the rear view closer to the visual quality and atmosphere established in the front rendering.
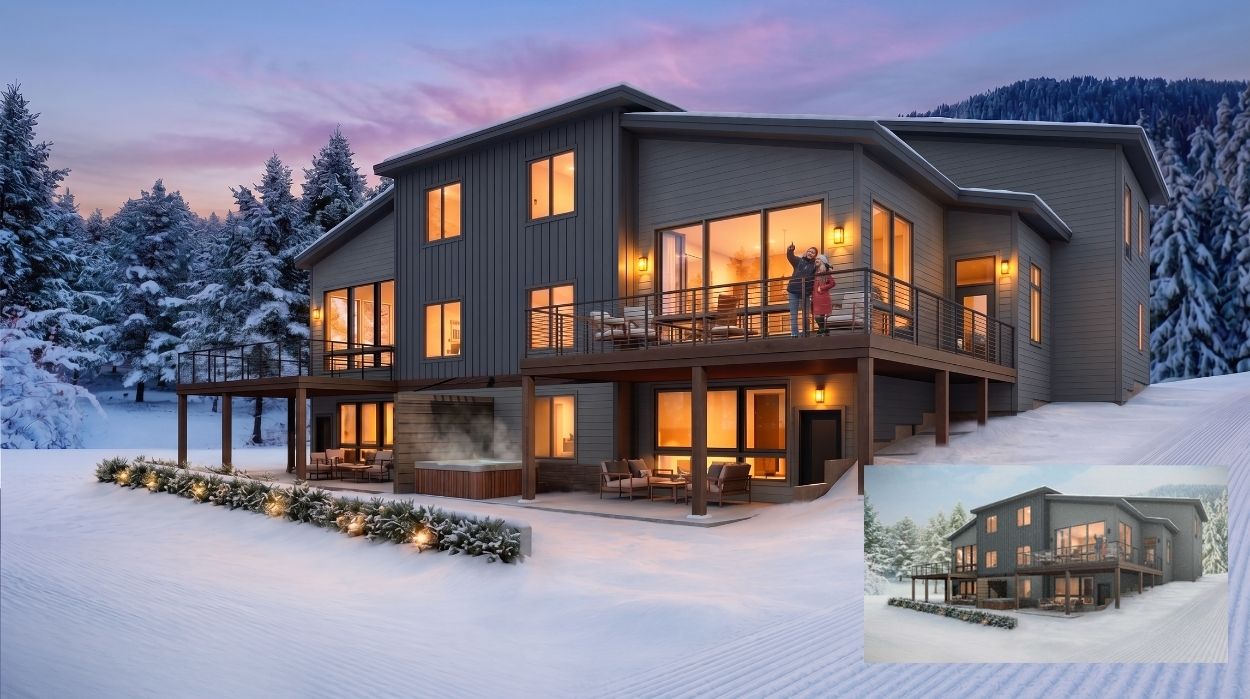
Figure 8. Rear Exterior Rendering With Updated Lighting
Cameron also wanted animation that could be used on his website and for social media publishing. The animation scope included three sequences.
The bedroom animation was planned as part of a 240° movement, with the bedroom and bathroom each receiving approximately 5–7 seconds of camera movement. The lighting adjustments were carried through so the animation remained consistent with the after-still rendering.
The bathroom animation followed the after-image brief, more open vantage. The goal was to show the space without the compressed appearance of the original camera position.
The living room animation had a longer sequence of approximately 12–14 seconds. The requested concept began at the snowy exterior of the house, moved toward the front entrance, and then continued into the living room before completing a 240° pan.
The living room animation was developed as the longest sequence, approximately 12–14 seconds, beginning with a view of the house surrounded by snow before transitioning into the living room interior. Once inside, the camera completes a smooth 240° pan across the space, revealing the room’s layout, furniture, lighting, and key design details in a continuous movement.
Watch the completed architectural animation on YouTube: https://www.youtube.com/watch?v=CtV8AU3DSsY
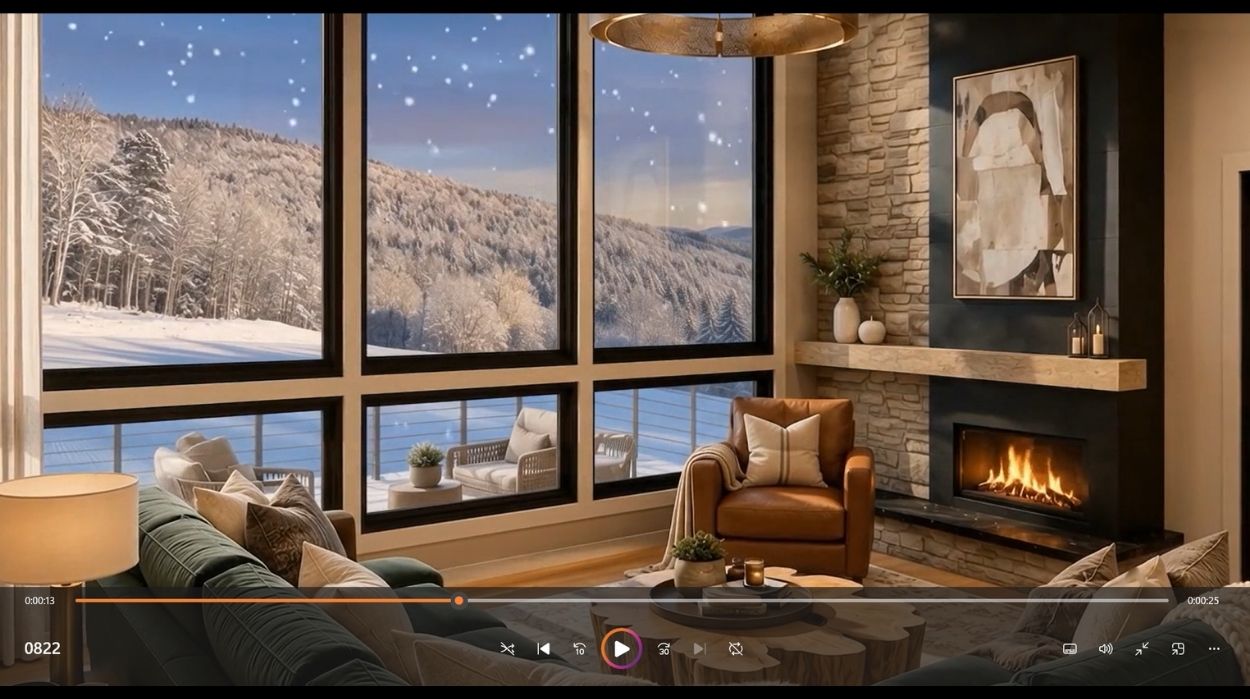
Figure 9. Living Room Exterior-to-Interior Animation
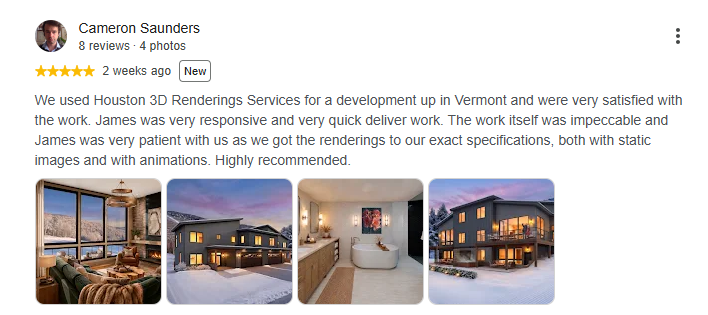
An existing rendering doesn't necessarily mean you're limited by the way it currently looks. As Cameron's project shows, existing visuals can be carefully revised when the drawings, references, and requirements are clearly defined. Take no words from us but our client Cameron.
Need Better Architectural Renderings? Already have renderings but aren’t satisfied with the camera angles, lighting, materials, or photorealism?
Send us your existing images and architectural drawings. Houston 3D Renderings can review your project and recommend the best approach for improving or rebuilding the visualization. Our team can review the project and determine whether rebuilding the 3D model and visualization is the right approach for achieving the result you're looking for.
Request a Free Project Quote → www.houston3drenderings.com
Can you improve existing architectural renderings?
Yes. Cameron’s existing renderings were revised for better camera views, lighting, materials, textures, and atmosphere without changing the architectural design.
Do you need the original 3D model?
Not necessarily. For this project, the 3D CAD model was rebuilt using the provided floor plans, renderings, references, and requirements.
Can you change the camera angle without changing the design?
Yes. The bathroom perspective was expanded and the bedroom camera was pulled back approximately six feet while keeping the original design intact.
Can still renderings be developed into 3D animation?
Yes. This project included three animations for the bedroom, bathroom, and living room, delivered in .mp4 format for multiple digital formats.